DLTK's Bible Crafts for Kids
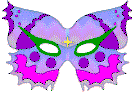 Butterfly Mask
There is also a choice of small and large templates for a butterfly mask or a basic mask (we mistakenly made the large one for Kaitlyn -- it didn't seem to phase her).
As usual, all the template links are listed after the instructions.
 Materials:
- printer
- paper
- glue
- scissors
- tape
- something to color with (if you're using the B&W template)
- piece of thin cardboard (we recycled a coke can box)
- 2 drinking straws OR a ruler OR an unsharpened pencil
- OPTIONAL:
- sequins
- sparkle glue
- feathers
 Instructions:
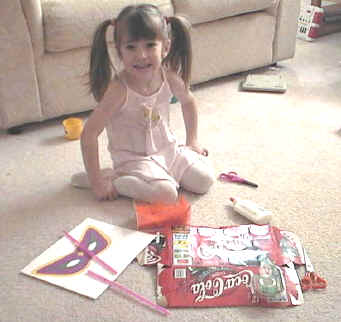
- Print template of choice
- Color the template piece, as needed.
- Take a big piece of cardboard (we used the coke cardboard... you
could use poster board or old cereal boxes) and spread glue on it
- try to spread a nice even coat so it doesn't soak through the template
- We used our fingers to spread it and then wiped off right away with a damp cloth.
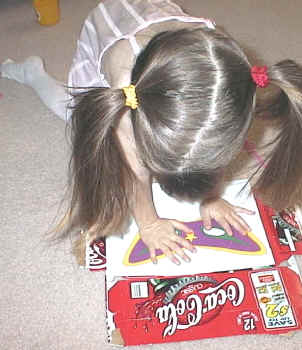
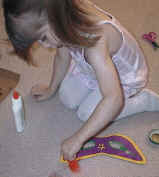
- Place the template (face up) onto the cardboard and press it down.
- Make sure all the EDGES of the mask are firmly glued down.
- If your kids have the patience, let dry at this point (Kaitlyn didn't, of course, so we moved right to the next step)
 Cut out around the mask. Since we're dealing with cardboard, this
is most likely an adult's job.
Cut out around the mask. Since we're dealing with cardboard, this
is most likely an adult's job.- Poke a hole through the center of the eyes and cut out the eye-holes. This is definitely an adult's job
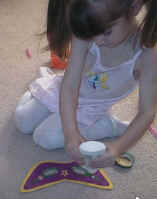
- Let your kids get creative at this point. Provide sequins, feathers
and/or sparkles. Let them glue these to the mask.
- One of the children (age 11) who did this craft put gold sparkles all around the edge and in the star (over all the gold parts of the template).
- She overlapped small green sequins in all the green parts of the template and
 she overlapped medium sized purple sequins in all the purple
parts of the template.
she overlapped medium sized purple sequins in all the purple
parts of the template.
- Another girl glued multicolored feathers all along the top edge of the mask.
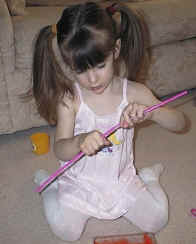
- If you're using straws, slide one straw into the other one
- I crimped the end of one straw.
- Kaitlyn struggled for 5 minutes to slide the one straw into
the other and finally managed it -- she was very determined to do
it herself.
Heaven help the mommy who tried to assist!
- tape the joint of the two straws.
- not all straws are created equally.
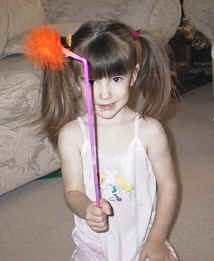 Our straws were sturdy enough to hold the mask without bending (after about 4 hours of
heavy duty play, we had to reinforce ours too).
Our straws were sturdy enough to hold the mask without bending (after about 4 hours of
heavy duty play, we had to reinforce ours too).- If yours aren't, wrap them once all the way up in scotch tape or masking tape before attaching them to the mask. This will reinforce them.
- If you're doing the butterfly mask, you'll definitely want to do this (it's a bit bigger/heavier)
- OPTIONAL: Tape some feathers to the end of the straw. We'd used a bendy straw for the top, so could tilt the feather end a bit.
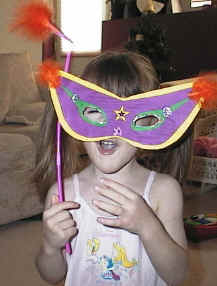
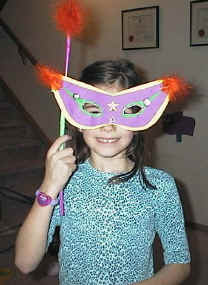
Kaitlyn (the one of the left who is so obviously in awe of her creation) is 3 years old. You can see that the large mask is a tad too big for her.
Tasha (the one on the right) is 6 years old. The large mask fits her just fine.
Mommy (not shown) is... er, substantially older than 6 years old. The large mask fit me fine too.
If you're not sure which you need, try printing out the B&W template (so you don't waste too much ink). You can then quickly poke out the eye-holes and check the size on your child.
Templates:
- Close the template window after printing to return to this screen.
- Set page margins to zero if you have trouble fitting the template on one page (FILE, PAGE SETUP or FILE, PRINTER SETUP in most browsers).
Basic Mask (large) (color) or (B&W)
Butterfly Mask (large) (color) or (B&W)
Basic Mask (small) (color) or (B&W)
Butterfly Mask (small) (color) or (B&W)
Printable version of these instructions