DLTK's Bible Stories for Children
Paper Quilling for Palm Sunday
 contributed by Leanne Guenther
Paper quilling, also known as paper filigree, is a craft that involves rolling and shaping thin strips of paper into intricate designs. It originated in Europe during the Renaissance period and became popular in America during the colonial period.
With its delicate and intricate designs, paper quilling is a beautiful and timeless art form that has been passed down through generations. Whether you're a beginner or an experienced quiller, there is always room for creativity and experimentation in this art form.
Materials:
- Cardstock to attach quill shapes to
- Quilling paper strips (or you can cut your own strips from colored paper)
- Quilling tool (a needle, skewer or toothpick can be used as a substitute)
- Glue
- Quilling board (optional)
- Scissors
Choosing your Paper:
For quilling, you should use thin and flexible paper that is easy to roll and shape. Here are some types of paper that work well for quilling:
- Quilling paper strips: These are pre-cut paper strips specifically designed for quilling. They come in a variety of colors, widths, and lengths, and are usually sold in packs. Quilling paper strips are a convenient option as they are already cut to the appropriate width, and they are available in a range of colors.
- Origami paper: Origami paper is also a good choice for quilling as it is thin, flexible, and comes in a wide variety of colors and patterns.
 Scrapbooking paper: Scrapbooking paper can also be used for quilling, but it is usually thicker than quilling paper or origami paper, so it may take more effort to roll and shape.
 - Thin cardstock or construction paper: If you don't have quilling paper or origami paper, you can also use thin cardstock or construction paper. However, you will need to cut the paper into thin strips (about 1/8" to 1/4" wide) using a paper cutter or scissors.
When choosing paper for quilling, it's important to avoid paper that is too thick or stiff, as it will be difficult to roll and shape. You should also avoid paper with a glossy finish, as it may not hold its shape as well as matte paper. By using the right type of paper, you can create beautiful and intricate quilling designs.
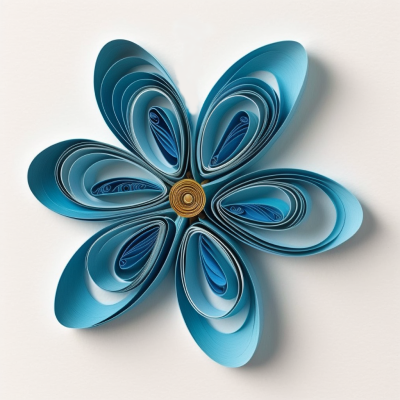
I think of paper quilling as an adult art more than a children's craft, but kids can quill simple shapes like flowers with teardrop petals. To avoid frustration, I recommend buying them quilling paper but if you have a paper cutter and some patience you can cut construction paper to make your own. The paper I buy has a little instruction sheet for the various quilling shapes so I won't repeat it all here. If you don't know what the shapes are Aunt Annie has a great basic description.
 What is a Quilling Board?
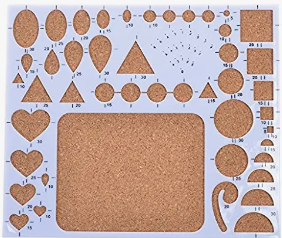
A quilling board is a tool used in paper quilling to help create even-sized quilled shapes. It is a flat board with a grid of evenly spaced, tightly spaced pins or pegs. The pegs are used as guides to help shape the paper strips into even-sized coils, making it easier to create consistent shapes for your quilling designs.
To use a quilling board, you start by placing a quilling paper strip onto one of the pegs at the edge of the board, and then rolling it around the peg to create a tight coil. You then slide the coil off the peg and glue the end to secure it in place. You can repeat this process with other pegs on the board to create coils of different sizes and shapes.
Quilling boards come in different sizes and shapes, with some designed to create specific shapes such as circles or squares. They are often made of durable materials like plastic or foam, and can be easily cleaned with a damp cloth or sponge.
While a quilling board is not essential for paper quilling, it can be a helpful tool, especially for beginners, to create consistent and evenly sized quilled shapes.
Instructions:
 Choose a quilling pattern or design that you want to create. I like to design my own -- I think that's half the fun -- but I've included a few simple templates at the bottom of this page suitable for children to quill with construction paper. I've also scattered a couple more complicated images throughout this page to give you a bit of inspiration if you choose to design your own -- note that I use a combination of papercut art and paper quilling to design the more adult looks!
- Select the colors of quilling paper strips that you want to use for your design.
- Using your quilling tool, roll the end of a quilling paper strip into a tight coil. This will be the center of your design.
- Apply a small amount of glue to the end of the strip and press it down to secure the coil in place.
- Roll another quilling paper strip around the first coil to create a larger coil. Apply glue to the end of the strip and press it down to secure the coil in place.
- Repeat the previous step with additional quilling paper strips, gradually increasing the size of the coils until you reach the desired size for your design.
- To create different shapes, pinch and shape the coils using your fingers.
- Once you have created all the shapes you need, glue them together to form your design.
- Let the glue dry completely.
- Use scissors to trim any excess paper from your design.
Optional:
- Use a quilling board to help you create evenly sized coils.
- Use different quilling techniques such as combing (if you have a quilling comb), fringing or husking to add texture and variety to your design.
Paper quilling techniques:
- Pinching: This is a basic quilling technique where you use your fingers to pinch the edges of a quilled shape to create a three-dimensional effect. Pinching can be used to create different shapes such as petals or leaves.
- Rolling: Rolling is the most basic quilling technique, where you use a quilling tool or a toothpick to roll a paper strip into a tight coil. This technique is used as the basis for creating all quilled shapes.
- Tight coil: A tight coil is created by rolling a paper strip tightly around a quilling tool. This shape can be used as a base for other shapes or can be arranged in different patterns to create interesting designs.
- Loose coil: A loose coil is created by rolling a paper strip around a quilling tool but not as tightly as a tight coil. This shape is used to create larger and more open shapes such as flowers.
- Husking: This technique involves looping and shaping multiple paper strips to create a unique three-dimensional pattern. Husking can be used to create different shapes such as stars or hearts.
- Combining: This technique involves combining different quilled shapes together to create a more complex design. This technique allows for more creativity and experimentation in your quilling designs.
- Fringing: Fringing involves cutting the edge of a paper strip to create a fringe effect. This technique can be used to create different textures and effects, such as grass or fur.
 These are just a few examples of different paper quilling techniques. By combining and experimenting with different techniques, you can create unique and intricate designs.
Paper quilling can take some practice to master, but it's a fun and rewarding craft. Experiment with different colors, shapes and techniques to create unique and beautiful designs.
Template (option 1)
Template (option 2)