DLTK's Bible Stories for Children
Watercolour Fronds for Palm Sunday
 contributed by Leanne Guenther
Watercolor painting can take some practice to master, so don't be afraid to experiment and try new techniques. With time and patience, you can create beautiful and unique watercolor paintings that capture the beauty of nature. Have fun!
Materials:
- Watercolor paper
- Watercolor paints
- Watercolor brush
- Palette or mixing tray (plastic lids work)
- Pencil
- Eraser
- Ruler
- Reference image of a palm frond (optional)
 Getting Started:
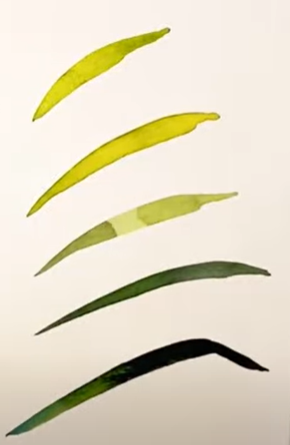
When watercolor painting, I love mixing my own colors. For palm fronds, all you need is blue, yellow and white. Use a scrap of watercolor paper to mix and test a variety of shades of green on your palette.
I always start my test colors quite light. It's easier to add a tiny bit of blue to darken a color than it is to add yellow/white to lighten a color that's too dark.
On your scrap of paper, practice making frond leaves with your different colours until you're comfortable. To make a frond, start off with light pressure and drag your brush in the direction you want your leaf to face, increasing pressure in the middle of the leaf and lightening your pressure again at the end of the leaf to bring it to a point.
 Instructions:
- Prepare your watercolor paper by cutting it to the desired size. You can use any size you like, but for this project, I like a 5"x5" (ish) square of paper.
- Use a pencil and ruler to lightly draw a grid of evenly spaced lines on the watercolor paper. This will help you to sketch out the palm frond accurately.
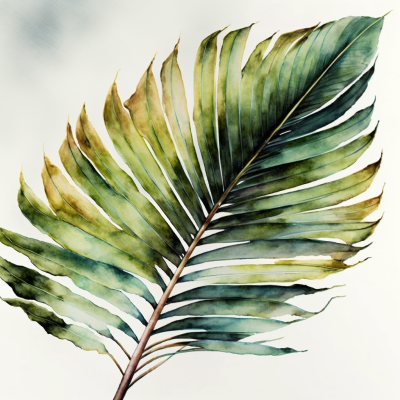
- Use a reference image of a palm frond, if you have one, or sketch out your own design on the watercolor paper using the pencil. Start by drawing the central stem of the frond, and then add the individual fronds branching off from the stem.
- Once you have sketched out the palm frond, use a watercolor brush and watercolor paints to add color to the painting. You can mix different colors on a palette or mixing tray to create the desired shades.
- Start by painting the central stem of the frond, and then add the individual fronds branching off from the stem. If you want, you can use a thin brush to add details and texture to the fronds but don't overwork your painting -- watercolour images are supposed to be loose.
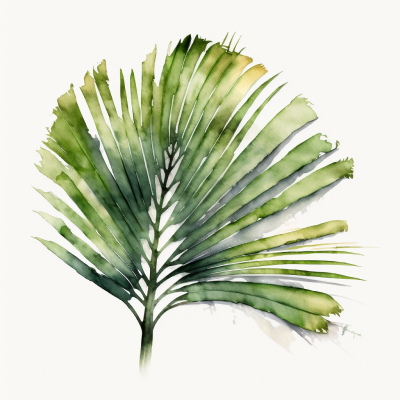
 Work your way through the painting, adding color and detail to each part of the frond. Be sure to let any sections that you'd like to overlap dry completely before moving on to the next section -- in the image to the side, I did a loose wash on the background then let it completely dry before painting my frond on top.
- Once you have finished painting the palm frond, let the painting dry completely.
- Use an eraser to gently erase any pencil lines that are still visible on the painting.
- Your watercolor palm frond painting is now complete and ready to be displayed.