DLTK's Bible Crafts for Kids
 Angel Pencil or Coin Holder
Contributed by
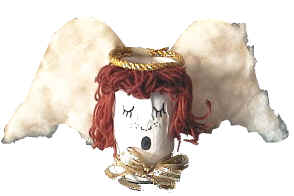
This angel craft is a great change holder if you're saving for a charity (it makes it that much more fun when an angel is guarding the gift). You can also use it as a pencil holder... we're making them as gifts this year.
The photo doesn't do it justice!
Materials:
- empty frozen juice container
OR - empty soup can (no sharp edges)
- white paper
- cotton balls or cotton stuffing
- black marker or paint
- hair-colored wool
- scissors
- glue
 OPTIONAL: gold ribbon or cord
- OPTIONAL: paper mache paste (1 part flour to 5 parts water...
boil about 3 minutes and let cool)
+ strips of newspaper and white paper
Instructions:
- EASY (Age 3+): Glue a piece of white paper onto the can
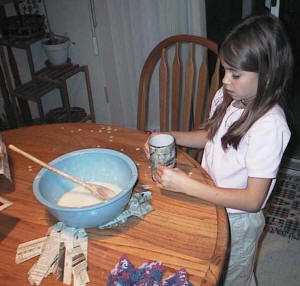
- HARDER (Age 6+): To make this project more fun for older children, paper mache the can (cover with 2 layers newspaper + one layer white paper).
- Let dry (takes about a day for the paper mache to dry)
- Print the template for the wings (or cut your own out freehand)
- Cut out the template pieces
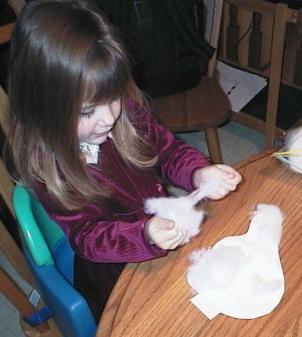 Cover with glue and put on pieces of cotton (you could substitute
white feathers if you preferred, but cottons usually more available).
Cover with glue and put on pieces of cotton (you could substitute
white feathers if you preferred, but cottons usually more available).- You can glue the wings onto a piece of cardboard (old cereal boxes) before you cut them out to make them sturdier if you wish. (we didn't do this)
- Glue the wings onto the back of the can (don't glue them too low... make sure the can can still stand up properly)
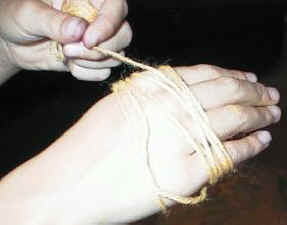 Take wool and wrap it around your hand or a 31/2 inch diskette
loosely about 10 times (hand makes shorter hair than a diskette would)
Take wool and wrap it around your hand or a 31/2 inch diskette
loosely about 10 times (hand makes shorter hair than a diskette would)- Remove the bundle and tie it at the "top" with a piece of wool.
- Snip the bottom ends so it's long like hair and glue it at the side of the head.
- Glue the hair to the side of the angel's head.
- Make another identical bundle and glue it to the other side.
- Make a third bundle, this time wrapping about 20 times around 2 fingers instead of your whole hand. Don't tie or snip this bundle. Fluff it out and glue it along the top of the can as bangs.
- OPTIONAL: Tie a piece of gold cord in a circle and glue it onto the
hair (we added a piece of tape at the back for extra support.
- OPTIONAL: Tie a gold ribbon around the bottom in a bow
- Using marker or paint, draw a face on the angel (we made closed eyes and an open mouth so she looked like she was singing, but you can do it any way you like)
- Younger kids may prefer to glue on wiggly eyes (or make paper eyes with white paper and a marker), a pompom or sequin nose and a felt or paper mouth as they won't be able to draw a face on very well.
Templates:
- Close the template window after printing to return to this screen.
- Set page margins to zero if you have trouble fitting the template on one page (FILE, PAGE SETUP or FILE, PRINTER SETUP in most browsers).
Template for Angel Wing (B&W only)
Printable version of these instructions